Playing games on laptops requires quite an amount of power and at the same time, you would need to keep your device from heating. This means, the fans of your laptop would be working in full speed. When this happens, noise levels increase which becomes quite disturbing and will definitely decrease one’s overall gaming experience. Fortunately, Whisper Mode was developed and launched at Computex back in 2017. This feature’s main purpose is to lessen and improve the mentioned noise level issues.
All you need is a laptop that has a GeForce GTX-10 series based graphics card or anything higher. Once you have this, you will be able to experience fully how Whisper Mode works.
What is NVIDIA Whisper Mode?
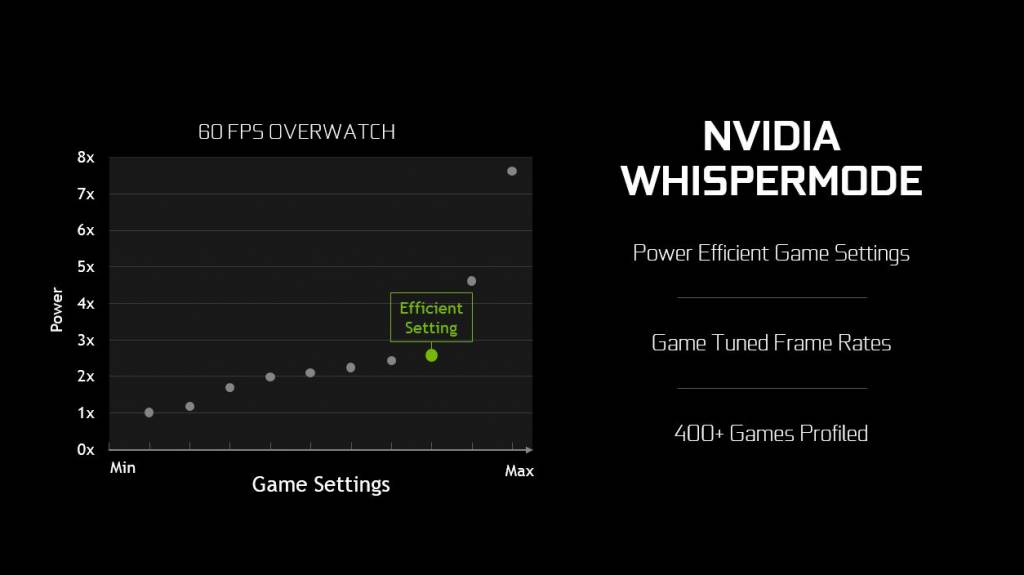
Whisper Mode is a gaming mode that makes your laptop run quieter while you are playing and enjoying your games. This feature was launched and created by NVIDIA and is supported and powered by GeForce GTX 1060 graphics card and higher. It smartly limits the frame rate of your game while it configures its graphics settings for more power efficiency. Example of how Whisper mode works is if your game is running above 60 frames per second it will restrict the game to 60 frames per second. With it, your fans will spin slower than it usually does due to the GPU not being fully used. Thus, this way, your overall noise level of your laptop will decrease.
Enabling Whisper Mode in NVIDIA GeForce Experience
Enabling and disabling Whisper Mode could only be done through the GeForce Experience Software. To acquire the said software, all you have to do is to download it from https://www.geforce.com/geforce-experience/download . Before installing GeForce Experience, ensure that what you are downloading is the latest version as Whisper Mode requires the GeForce 384.76 driver or a later version. Once you have done it, all you have to do to enable Whisper is to follow the following steps:
- Look for the gear icon which is located on the top menu and click on it.
- Go to settings
- Go to the Games section and you will find the Whisper mode option. It is located on the right pane of the window.
- Click the slider and slide it to enable the feature.
Customizing Whisper Mode Using NVIDIA Control Panel
Now that you have enabled your laptop’s Whisper Mode, you will want to customize it next. By customizing it, you will be able to further restrict the FPS for each game that you have. To do this, you will need to do the following steps:
- On your desktop, right click then go to NVIDIA Control Panel and click on it.
- Click on Manage 3D settings
- Go to Program Settings
- In this step, you will be able to choose a game from a list seen through a dropdown. Scroll down until you see Whisper mode.
- Click on the dropdown and choose your frame rate restriction slider.
- If you are concerned about the noise, move the slider to the left. If you are concerned with the performance on the other hand, move the slider to the right.
Conclusion:
With the development of Whisper Mode, you will no longer have to worry and be bothered by the noise that your laptop’s fans are producing whenever you play your favorite games. Aside from that, the Whisper Mode will maintain and restrict the frame rate to create a perfect balance between GPU usage and the noise level.
For those who loves Witcher 3, Whisper Mode restricts this game to a frame rate of 40 frames per second as a default. Battlefield and Overwatch on the other hand will have a 60 frames per second cap. If you are not comfortable with the mentioned rates, you could always adjust them to your liking.
So, with all that said, what your thoughts on this new gaming mode? Let us know, we would definitely love to hear them. Please do leave your comments below.


