Ring and Apple users have always been curious if it is possible and when would it be able to integrate both Ring and Apple devices. The integration has officially been announced by Ring twice already. However and unfortunately, until now there is no specific date as to when this would happen. We understand how frustrating this could be and though this is the case, we are sure that you would agree with us when we say that Ring is something worth your money especially with all its features and how much reliable it is.
Since everyone including us are still waiting for Apple and Ring devices to be integrated, for now, we could check out Ring and HomeKit. Hence, in this article, we shall feature both Ring and HomeKit.
Does Ring Work With HomeKit?
As of today, the official answer to this is no. However, due to some reverse engineering by HomeKit developer community, there are software solutions that have been made available which allows us to connect Ring to HomeKit.
For this to be possible, you would have to use a hub or a bridge to connect your smart device to your smart home platform. By doing this, your device will act as a translator which would work as a communicator between different platforms. Moreover, as mentioned earlier, the software developed could work as a translator of commands which it communicates between your HomeKit and Ring devices. All of this is possible depending on the Ring features that you would want to use in your HomeKit.
Homebridge – is your go to solution. It supports a wide range of Ring devices including but not limited to cameras, alarms, lights and sensors. The only downside of this is that you will only be able to access live streams and basic notifications.
Scrypted – This is a new option which supports all kinds of cameras as long as they have HomeKit Secure Video support. The only downside of this is that it does not support any other Ring connected devices.
What is Homebridge?
Homebridge is a software which usually runs in the background. It is like Philips Hue bridge and it is free to use. It is open source and could work or un on different computer platforms.
It could translate the device maker’s commands to and from your HomeKit. For this to happen, the bridge device has to be supported. This way any device that would be connected to the bridge could be recognized by HomeKit automatically.
Usually it is the bridge marker that defines the device but since HomeBridge is a third party bridge software, it is defined by third party plugins. Luckily, there are a lot of third parties that are available. All you have to do is to install to your device to your HomeKit smart home. Hence, in other words, you would surely be able to find all different sorts of opportunities when you install your HomeBridge.
In Ring’s case, your plugin would be the one that would connect your Ring’s cloud services to your Home Hub. This would then allow your HomeKit to acknowledge and see your Ring device.
Options for Getting Homebridge
What is great about HomeBridge is that it is very light which means, it could sit on the background and do its work 24/7. In fact, it would be highly recommended that you run it on your Raspberry Pi. You could also use HOOBS which would definitely provide your reliability and it would also be low maintenance.
HOOBS or HomeBridge Out of Box System runs out of the box. All you will need to do is connect it to your network and start installing plugins.
Ways for Initial Setup – HOOBS
- Get a Raspberry Pi
- Get the HOOBS image and download the image and save it on your Micro SD card.
- Buy a pre-imaged Micro SD card from HOOBS
- Purchase a pre-configured Raspberry Pi
Getting Started Checklist
- You would need a home hub to make sure that your HomeBridge would work.
- Raspberry Pi device
- HOOBS image if you do not go for the pre-built option
How To Connect Ring to HomeKit Using HOOBS
- Plug in your Raspberry Pi
- Connect your HOOBS to your network
- Install your Ring plugin
- Connect your plugin to your Ring account
Connect your Raspberry Pi
Once you have unboxed your Pi, put in your MicroSD card and turn it on. If you have a monitor, you will get instructions on how to set up WiFi and how to connect to user interface. Though this is convenient, it is not required nor you would need to connect a mouse or keyboard to your Raspberry Pi.
Set up HOOBS on your network
If you are using Ethernet connection, you would not need to worry as HOOBS will take care of the network configuration. However, if you are using WiFI you would need to set up and connect it. The set up is pretty much similar to other smart devices.
On your iPhone, check for WiFi network HOOBS. Connect and you will be prompted to select your WiFi network. Then enter the passphrase which would configure your HOOBS box on your network. If you mess up, the process with reset itself and you will have to start over. After your connection has been established, enter your username and password as your administrator account.
Pair HOOBS with HomeKit
Once you are at the dashboard, you could now run your HomeBridge server. Before you add any plugins, you will have to pair your HOOBS with your HomeKit. Do not worry as this is pretty much simple and straightforward. All you have to do is use the pairing QR code that HOOBS has provided on its dashboard.
Once done, go to Apple Home app and add an accessory. Scan the code with iPhone camera and once pairing has been successful, your HOOBS will be connected as a bridge accessory. Check by selecting the House icon on the top left and scroll down to the home settings. Select Hubs and Bridges section. Assign your HOOBS device to a room.
Install the Ring plugin
- Click Pligin icon found on the menu bar
- Select search
- Type ring on the text field
- Look for plugin Ring with HOOBS certified logo
- Select Install
Connect Ring to the plugin
- Click plugin menu icon
- Select HOOBS server from the next column
- Click on Ring plugin
- Select configuration
- Click Link Account button button
- Open browser window to the Ring login page
- Enter your Ring login
- Two factor auth code will be sent to you via email. Copy the code into the box in the plugin page
- Save
What Ring Homekit Integration Can Do?
There are a lot of options that you would be able to find in the plugin’s configuration page which you could use to customize your Ring on your HomeKit. You will be able to show and hide features, adjust settings and timers. It allows you to be flexible in terms on what you would want your Ring devices to be shown and used on your Homekit. You would be able to separate controls for your camera floodlights, sirens, polls, trigger AppleTV doorbell and many more. When you are adjusting your settings remember to always save changes.
Ring cameras in HomeKit
Ring cameras has the ability to generate thumbnails in the Home app. It could be refreshed every 10 seconds depending on your mode settings like generating snapshot when motion is detected. You could also turn this off.
Another feature that you would find convenient is that you could view live from your Home app. All you have to do is to tap your camera thumbnail and you are ready to watch and stream real time. However, they are much slower than HomeKit cameras that are directly connected to WiFi. Other features that you could use and that are available are flood lights, Ring camera sirens, motion sensors and many more. Keep in mind that you will not be able to do video recording if you are using HomeKit Secure Video.
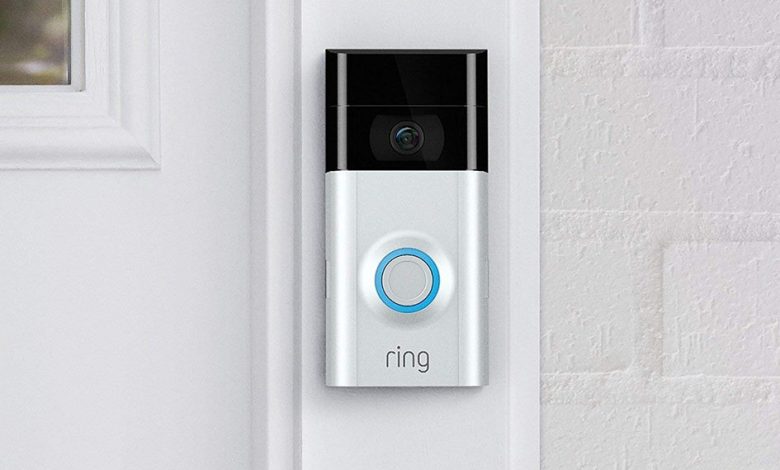
Ring Doorbells in HomeKit
Ring Doorbells are similar to other cameras. It could also be used as a doorbell button as well. Once the button is pressed it will trigger scenes. You could also get and receive notifications once you have activated the HomeKit notifications.
Ring Alarm in HomeKit
What is amazing about Ring Alarm is that all its accessories are supported. This means, you could monitor the keypad battery level, trigger automations, notifications from its water, smoke and CO sensors. You will also be able to control smart locks as well. In the security panel of the Home App, you will find the status of your system. In it, you will be able to change its modes – Home, Away and Disarm. There is also a virtual Home app emergency buttons which you could add in the plugin configuration. Moreover, the burglar alarm, fire alarm and panic buttons are also supported.
Ring Smart Lighting in HomeKit
You could connect different Ring products to your Ring bridge. This way you will be able to control them as a HomeKit accessory. This includes thermostats, lights, fans and switches.
HomeKit Notifications
Now that you have set up your Ring device on your HomeKit as a normal accessory, you could also set up notifications. This could include motion notifications from your camera, doorbell rings, etc. Keep in mind that since there is now a connection and link between two systems, you will have to go through quite a number of steps. This also means that notifications could also be slower when you are using the Ring app directly.
What Else Can Homebridge Do?
You will be able to start adding other plugins such as sensibo, chamberlain, broadlink and Alexa.